

In the previous article, we discussed the importance of Salesforce localization and how to set up your organization for multilingual. In this article, we will talk about Salesforce Translation Workbench. The information provided here is closely related to the previous article, please make sure to read it first. Read here.
The Plan
Salesforce is a fully customizable platform where you can apply the localization best practices easily. But to be able to cover all the localization aspects the following let’s cover the following topics:
- What are the steps to enable Salesforce localization? (the first blog)
- How to use Salesforce Translation Workbench to export/import translations.
- What is the Salesforce structure from a globalization architecture point of view?
- How Salesforce APIs can be used in localization?
- How to develop a connector to export and import content for Salesforce?
Based on the setup we did in the previous article, we now have the following items ready in the system:
- The target language(s)
- Translators.
We are ready for Translation!
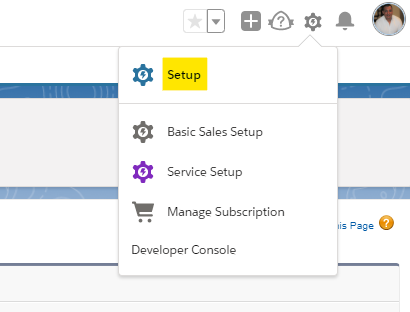
How to access Salesforce Translation Workbench?
From Settings click Setup
Write Translation Workbench in the Search box in the left column.
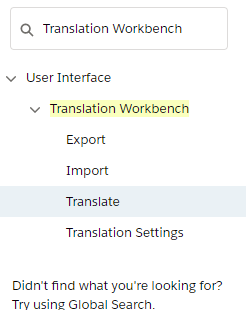
As you can see in the above screen, we have four (4) nodes under Translation Workbench:
Export: This is an option to export content for translation outside Salesforce.
Import: After translation, you can use this button to import content.
Translate: Inline translation within the system.
Translation Settings: This is the node we used in the first blog to setup languages and translators.
Translation Options
Through Salesforce Workbench, we have 2 options to translate our content:
- Manual Translation (inline).
- Automated process (Export / Import)
Manual Translation Process, Pros, and Cons
The Process:
Click Translate from the Translation Workbench node to open the translate module.

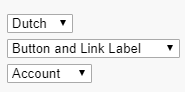
Now, it is very important to understand the filter criteria section clearly
Language: the drop-down will list the languages that you already setup (see the first blog)
Setup Component:
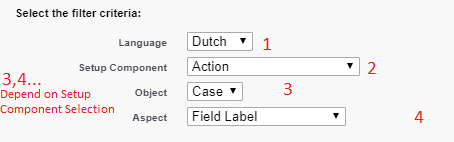
Depending on the selected component the next filters may change as below. The next filters can be a combination of Object and/ or Aspect or Custom Report Type Entity.
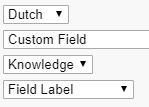
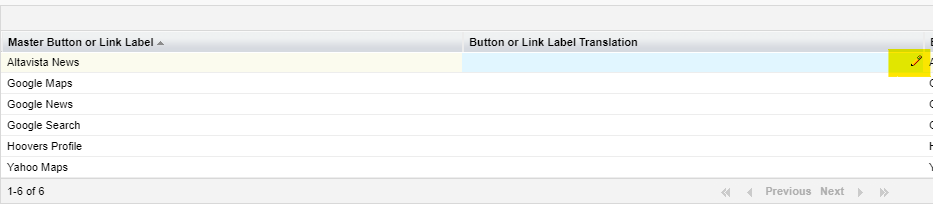
Once selected you can check the translation records displayed based on your filter criteria.
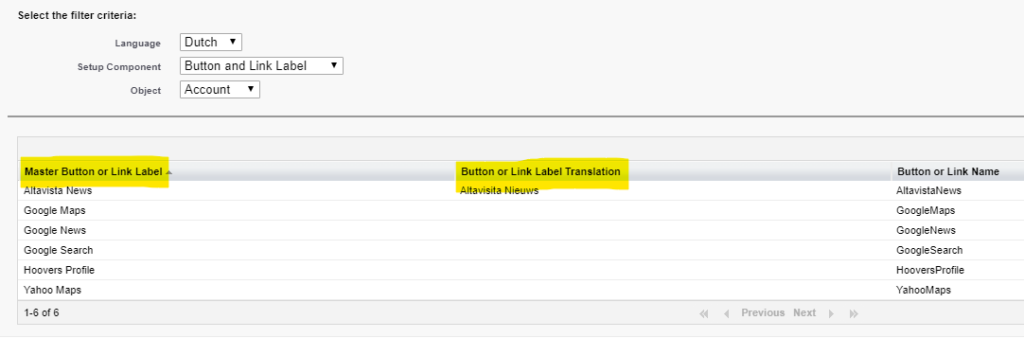
The first column “Master Button or Label Level” is the original text in the source language
The second column “Button or Link Label Translation” is where you will add the translation. Double click it and insert the equivalent text in the target language.
Out of Date Column

This column is important because it shows you that the original content of a record changed since it was translated and then helps you to identify the content that needs to be updated.
Pros & Cons
As you can see, this approach is suitable for a small amount of translation but not for bulk translation.
Export & Import content using Translation Workbench
Instead, we need to use the Export/ Import feature of the Salesforce Translation Workbench.

Once you click the Export node under Translation Workbench, the export page will be displayed.
What type of content can we export for Translation? 3 Types:
- Source: Export the Source content (regardless it was translated or not).
- Untranslated: Only export the content that was not yet translated.
- Bilingual: Export the source and the target equivalent translation. This can be useful for proofreading and QA of the already translated content.
What are the Exported file formats? 2 Formats:
- STF: Salesforce Translation Format. It is a Tab Separated format structure.
- XLIFF: XML Localization Interchange File Format.
Before explaining each of these formats let’s finish this part by showing you how to download your exported file.
Once you click export you will see the following Message:
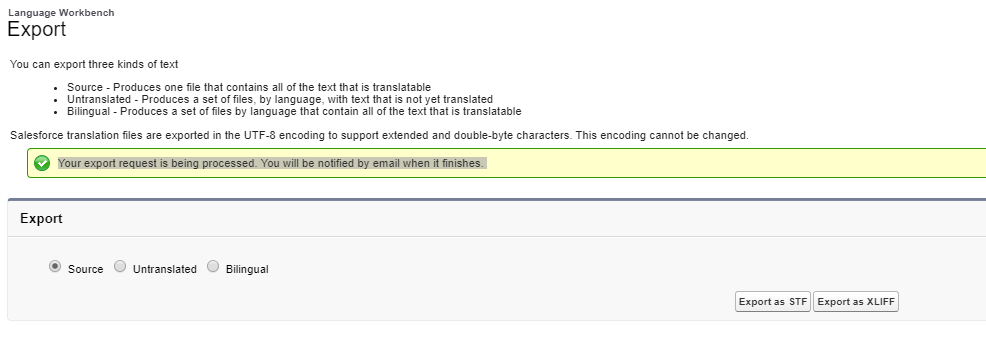
You will be notified by email once the export process is done and the time depends on the size of the exported content. Once you received the notification, you will get a link in the email to download your package. Please note that the Salesforce Document Section is available in the Classic version only and not in the Lightning Experience.
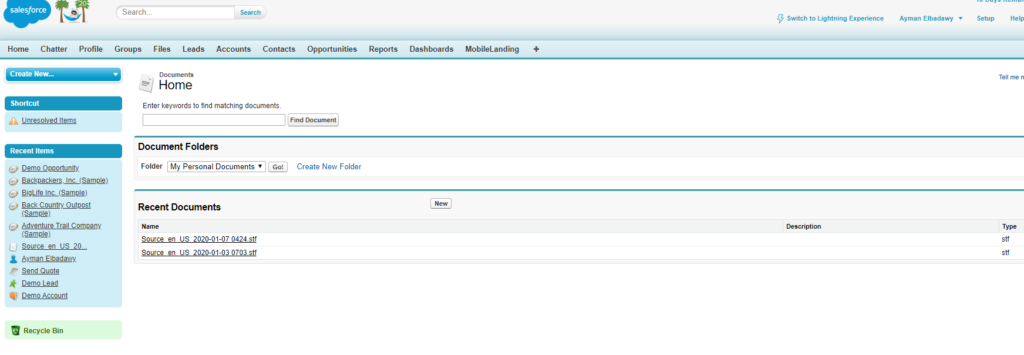
Now, Click the package you want to translate.
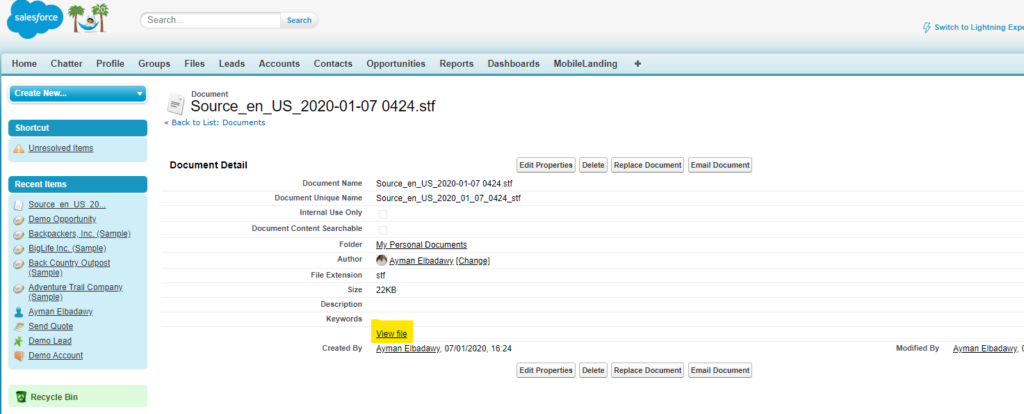
Click View and download the package.
Notes:
- Regardless of the type or format selected, this is the way to download your package.
- Important: You can automate this process by using a connector or Salesforce APIs. The next article will cover this section in detail.
Let’s review the localization workflow and the processing of each format
Salesforce Translation Format (STF):
XLIFF is the common standard format recognized in the Localization Industry, but the STF format is important because it’s developed and customized by the platform itself and can be safer to use for a smooth export/import experience.
The common scenario that the clients are following when they use this format is:
- After downloading the package, they import it to an Excel file
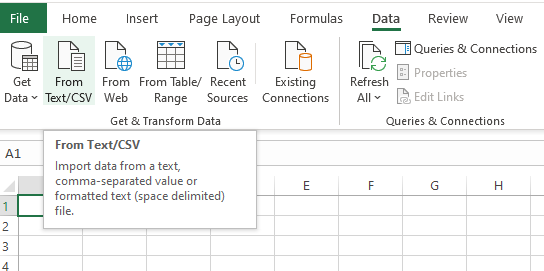
From the Data tab, Select Text / CSV. Then change the Delimiter to Tab instead of Comma because the STF file is a Tab Separated format:
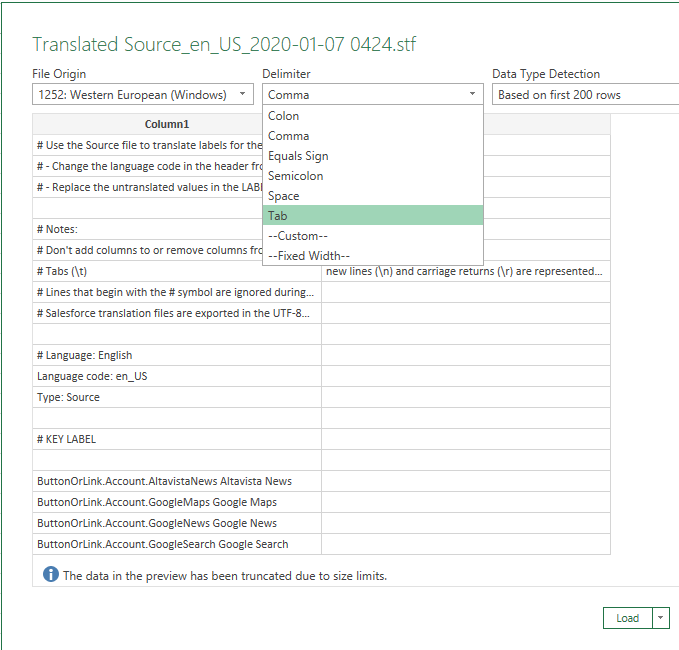
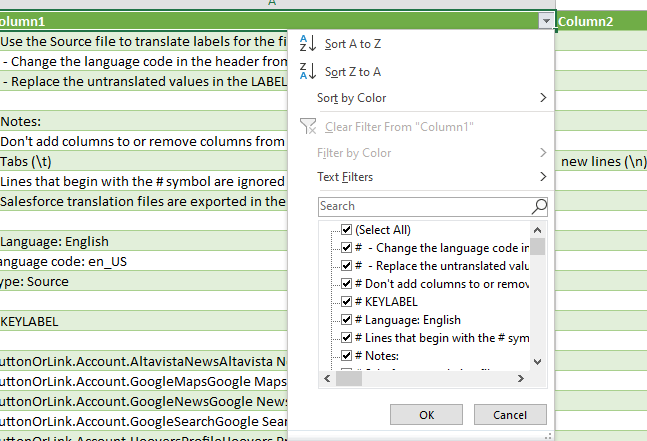
Once all the settings are okay, click Load. After loading you will need to hide the Comments at the top of the document (starting with #)
The next step is to save it and send for translation, some others convert it first to UTF-8 format TXT file before translation. After the translation, you will need to convert it back again to STF format.
As you can see, it is an unacceptable manual process because it is very time consuming and may introduce errors to the structure of the file or lead to encoding issues.
Another approach
During working on similar cases, I found another approach that will dramatically reduce the engineering time and effort and will ensure the accuracy of the structure. I would like to share this approach with you: Why not use the STF directly in SDL Studio (or another CAT tool. But in this demonstration, I will use SDL Studio!
If you try to import an STF file directly to SDL Studio the process will fail. You know why?
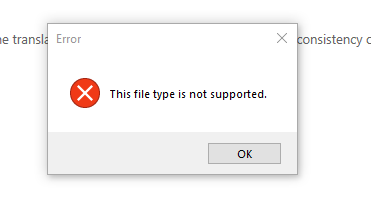
STF is a custom extension and SDL Studio cannot recognize it directly. Instead, you need to do a very small change, one time only. So you can later use STF extension directly without redoing anything.
Open you SDL Studio, go to File tab then Options, then Files Types:
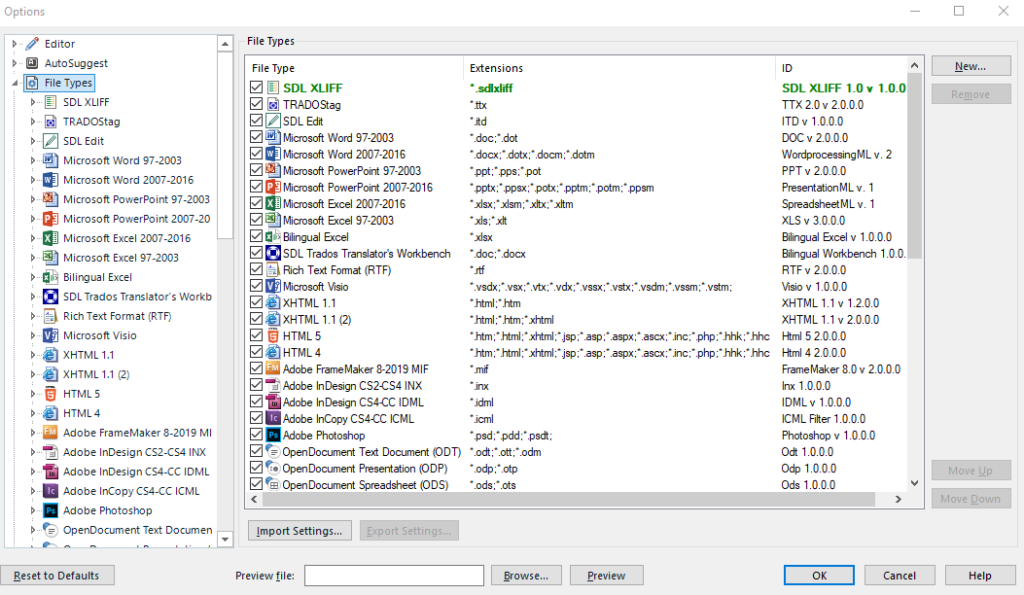
Scroll down till the node Tab Delimited Text.
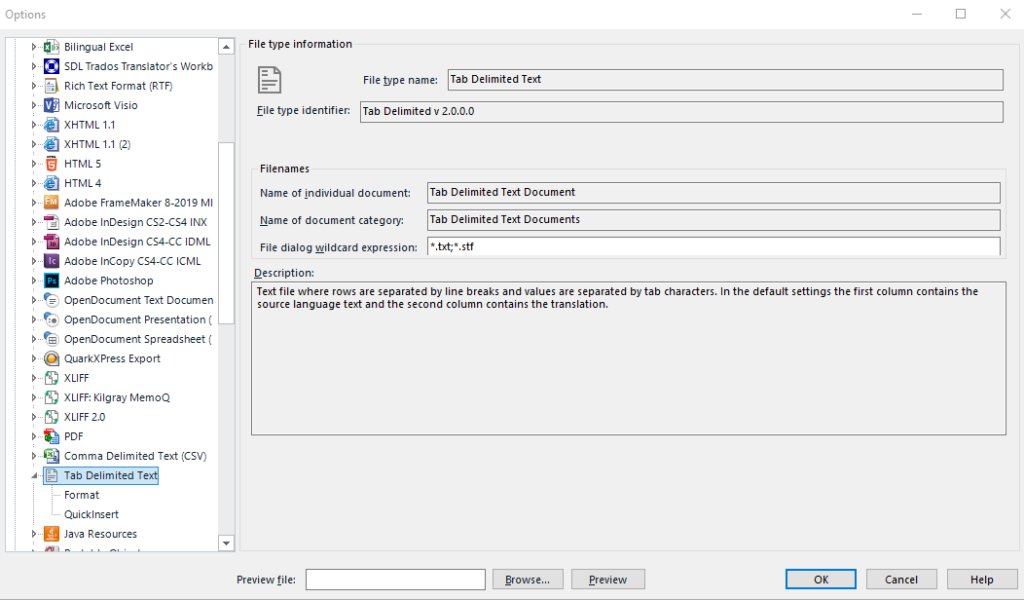
Now in the field File Dialog wildcard expression, after *.txt, adds the following: semicolon (;) then *.stf and click ok to save it. As STF format is originally a Tab Delimited format, we just need to let SDL Studio know that STF is an extension that follows this category and then SDL Studio will manage the rest.
Important note:
You may get another error during importation to SDL Studio even after adding the extension says:
“Double Quote Character within the unescaped field.”
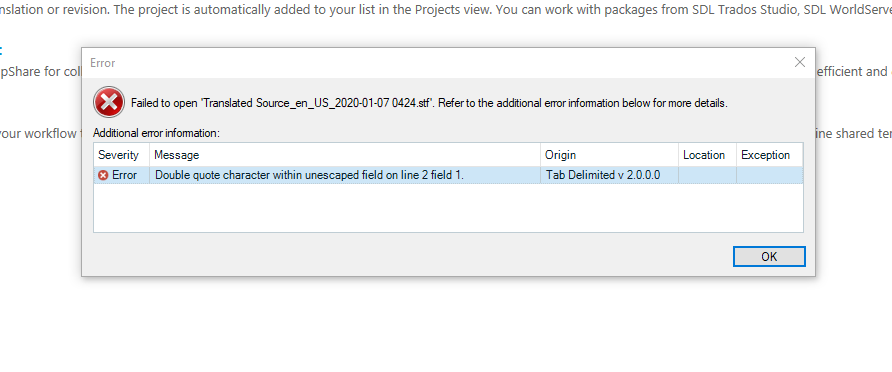
Not sure if this is a general bug from the Export Engine in Salesforce or not. By default, Double Quote not escaped is not allowed in Tab Delimited file. I will share it with some of my Salesforce contacts to double check then I will update the article. But in this case, here is the solution you can do from your side to overcome the issue:
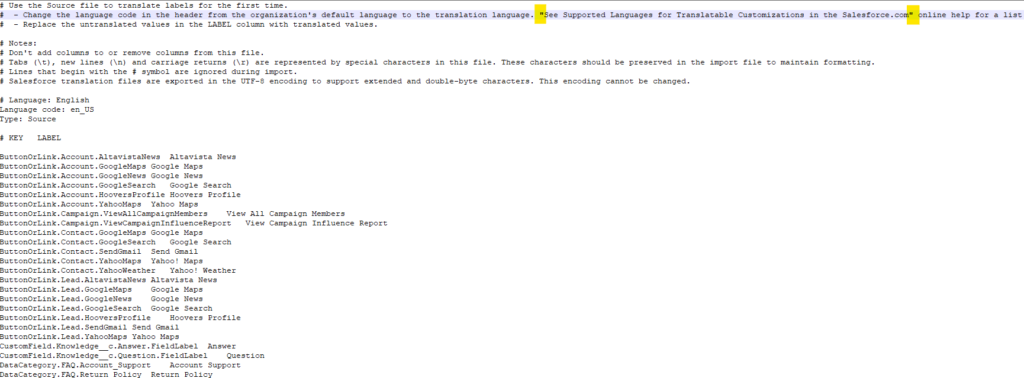
Open the STF document using notepad or notepad++ and at the top, you will see the comments section. You just need to remove the double-quotes.
Now, import the STF file directly to SDL Studio without any problem BUT…
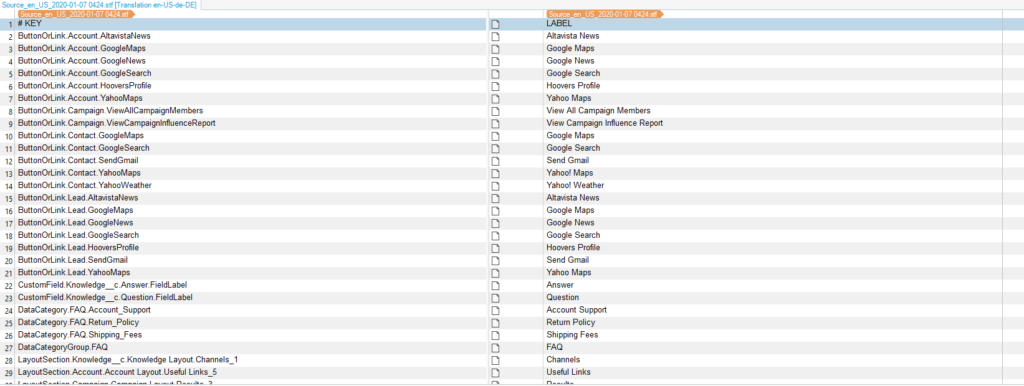
Check the above screen. Do you see the new issue?
Yes, the left column is displaying the Field Names which should not be translated. Instead, the content in the Target (the right column) is the one that needs to be on the left column. One more small change needs to be done…
Return back to your SDL Studio options, again go to Tab Delimited Text.
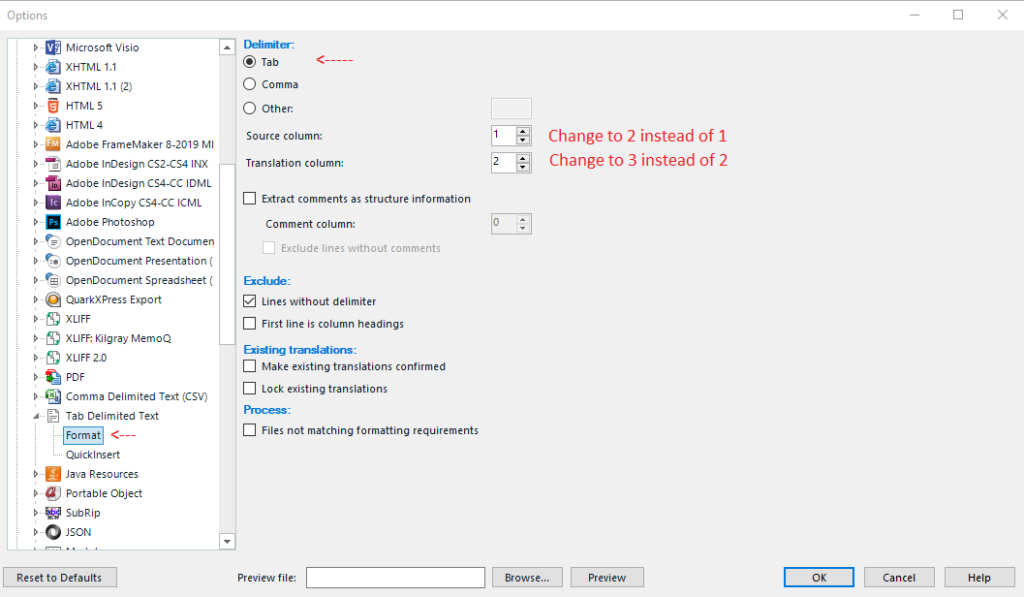
Now Select Format.
- Make sure the delimiter is Tab
- Source column: Change it to 2
- Translation column: Change it to 3… Done.
Why do you need to do this adjustment?

As you can see in the STF file above, Column 1 (before the Tab) includes the Field Label Name while column 2 has the source to be translated. SDL Studio, by default, considers the first column as the source. That’s why I made the above change to solve the issue. Now your STF file is ready to be imported to SDL and again these additional steps are to be done only one time.

XLIFF format.
XLIFF is a well-known format for all who work in the localization Industry. So, nothing special about the localization process here except for a couple of challenges:
You may get the following error when you try to import the XLF file into SDL studio
The issue here is very simple. If you open the *.xlf file and check the source and target languages you will see them written like this:

Do you see the issue? Instead of en_US, it should be written en-US. (dash instead of underscore). 😊 Not sure also if this is a general bug or not!
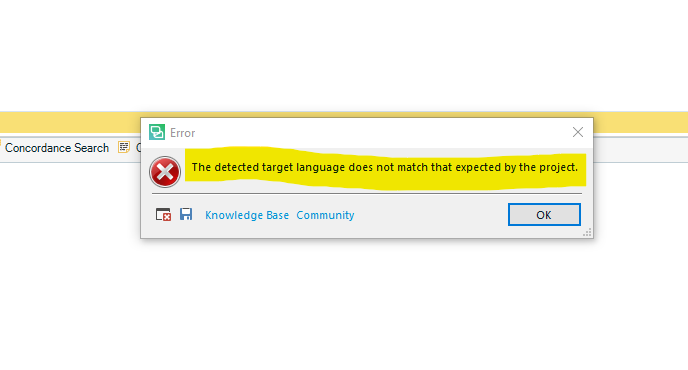
Also, it is recommended to change manually the target language and not to leave it also en-US to avoid other issues like the following:
Languages & locales
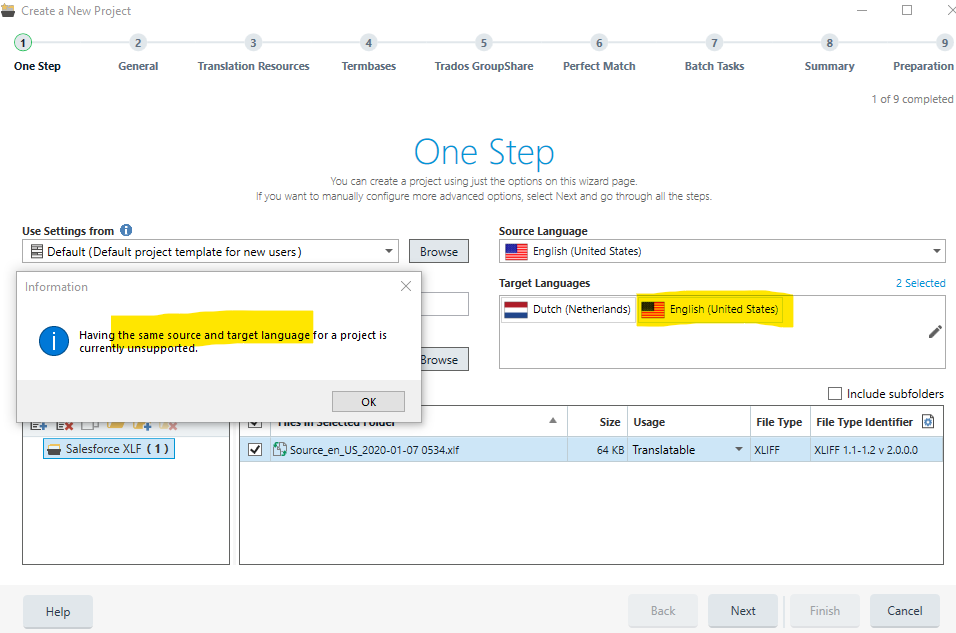
SDL Studio is very sensitive when managing source and target languages and locales. Based on that, it will detect that the target language is en-US even you are selecting another language during your setup. Then, it will raise an error that says source and target cannot be the same language.
Well, small issues but they can be confusing. An eye on detail is needed to eliminate them from the beginning, This will help you run your localization projects smoothly and efficiently.
Conclusion
Now, we talked about how to set up your Salesforce for localization in the first article, and in this one, we discussed how to translate, export, and import content using Salesforce Translation Workbench. The next article will be about the Globalization Architecture of salesforce, how to consume APIs to localize dynamic content, and then discuss another alternative which is designing and using a Connector to export and import content from Salesforce.
Feel free to leave a comment or to Contact Me for an open discussion!