

Business is changing fast these days! Unified User Experience became the first challenge to retain current customers, getting more leads, and increase conversion. Nowadays, everyone and everything is connected and at the beginning of this new 2020 decade, the interaction with customers will change dramatically. Salesforce helps companies stay connected to their customers, prospects, opportunities, and more. It’s the World’s number one CRM platform. Salesforce localization is very important to get the most benefits out of this top cloud-based business solution in a global environment.
The Plan
Salesforce is a fully customizable platform that can be fully localized. But to be able to cover all the localization aspects the following topics need to be covered:
- What are the steps to enable Salesforce localization?
- How to use Salesforce Localization Workbench to export/import translations.
- What is the Salesforce structure from a globalization architecture point of view?
- How Salesforce APIs can be used in localization?
- How to develop a connector to export and import content for Salesforce?
Salesforce has 3 levels of languages support:
- Fully supported languages: All features can be localized to any of the fully supported languages including help.
- End-users languages: Salesforce provides localized labels for all the standard objects and pages except admin pages, setup, and help.
- Platform-only languages: This option can be used, when salesforce doesn’t provide default translation.
Here you can find all the languages listed under each of the 3 above levels of support.
The Localization Setup step by step
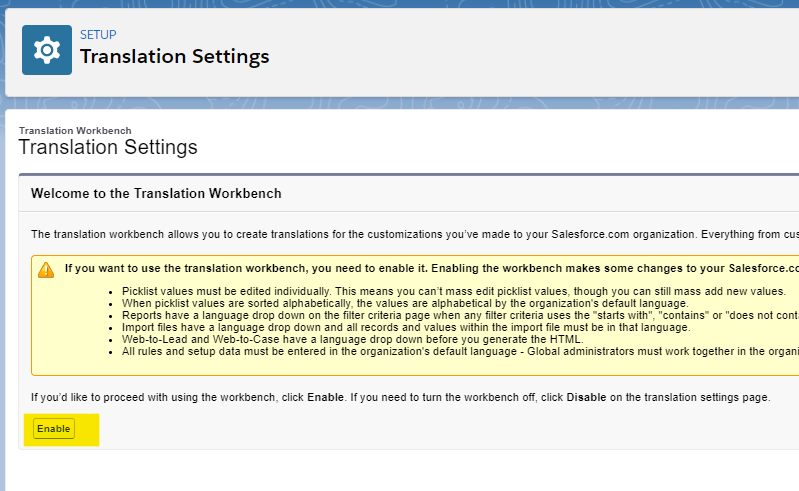
First, to set up localization in salesforce, you need to enable Salesforce Translation Workbench. Here are the steps:
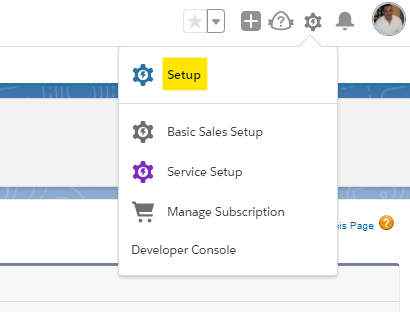
From Settings, click Setup
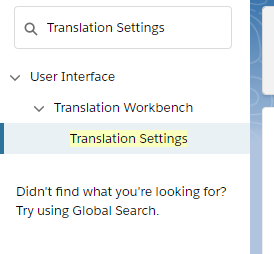
Then, from the left panel, write Translation settings in the search:
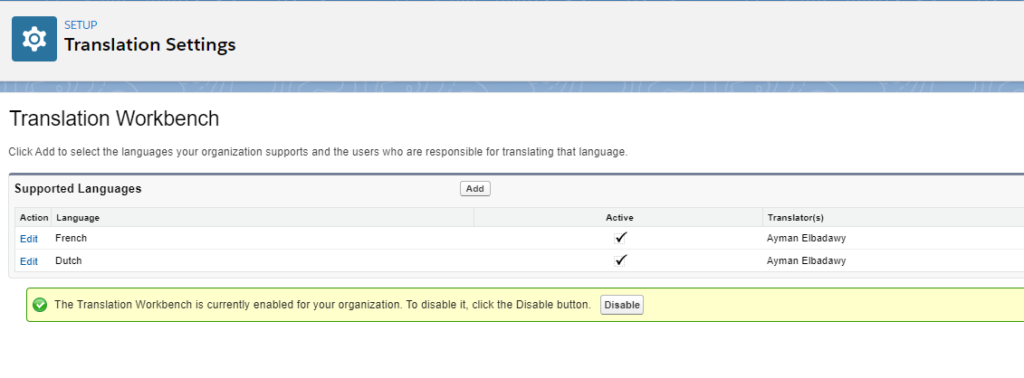
You will be redirected to the Translation Settings page where you will enable Translation Workbench.
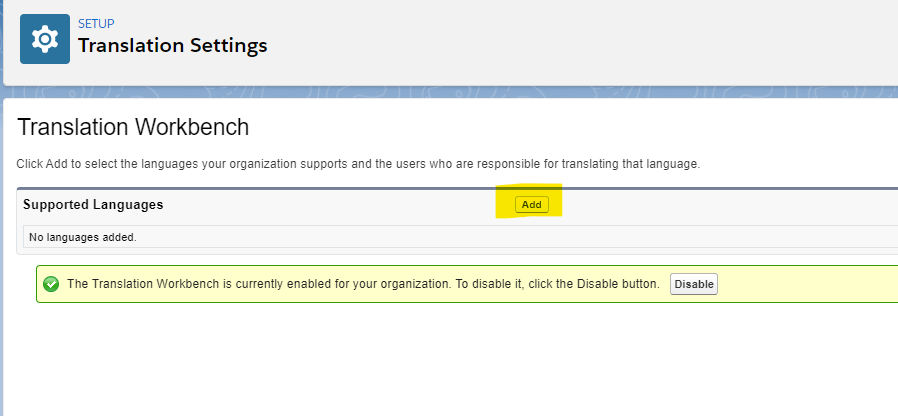
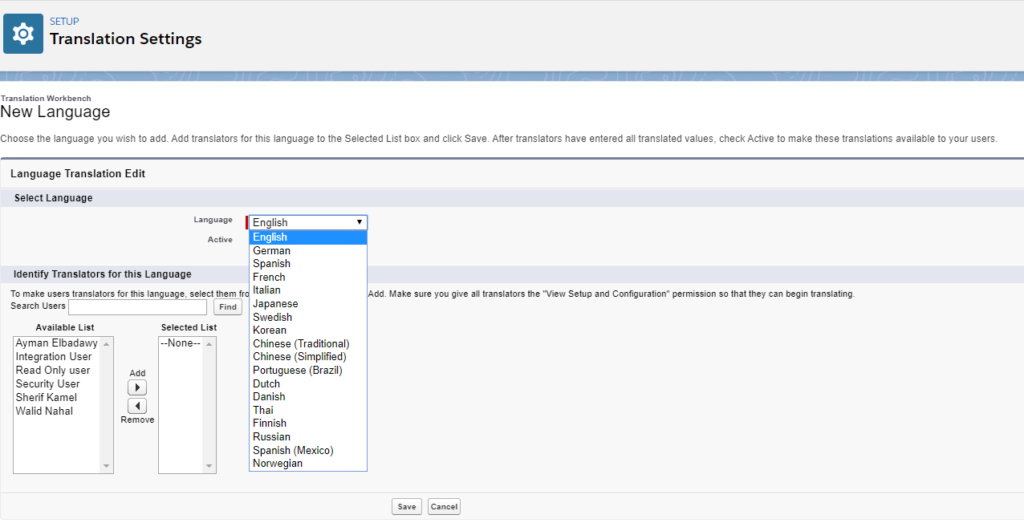
The next step is to set your target languages. Click Add
Then, select language and click Add. Repeat the same step to add additional languages.
Important Note: What if you didn’t find your target language?
In this case, your target language is not one of the fully supported languages:
- You need to enable End-Users languages to be able to add it.
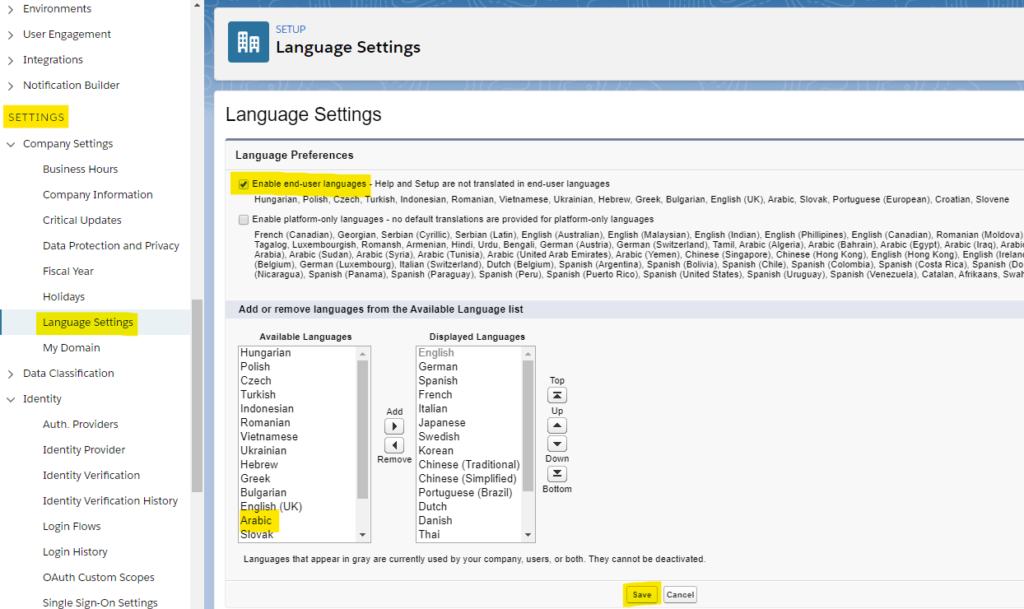
- Under Settings, click Language Settings.
- Below Language Preferences check “Enable end-user languages”.
- From the Available Languages select your language.
- Use the arrow to insert the selected language to the Displayed Languages panel.
- Don’t forget to click Save!
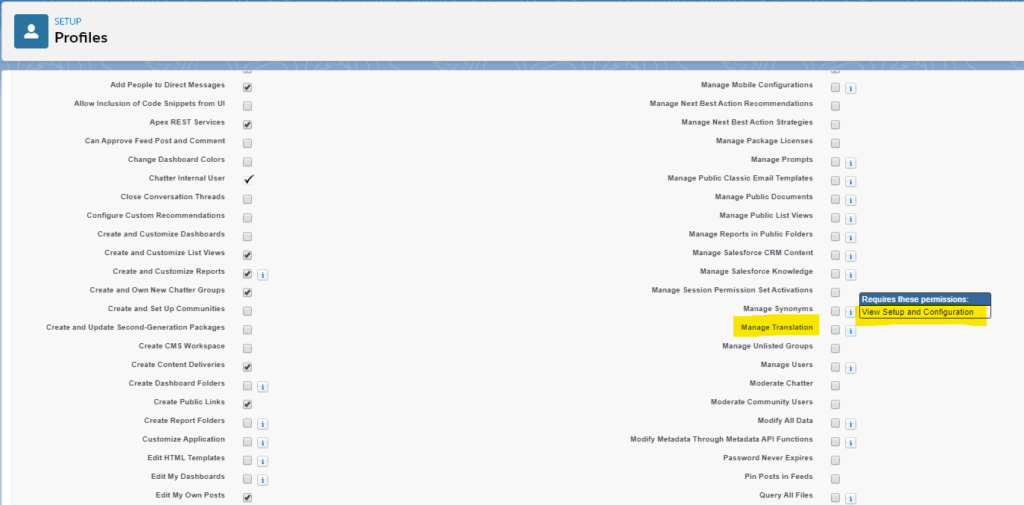
Now you have your target language setup. But to be fully done, you need to assign responsible users/translators for each of your languages. In order to allow users/translators to deal with their assigned languages, they must have granted administrative permission: Manage Language. Following the best practices approach, it is better to create a new Translators profile, give it the appropriate permissions than assign users/translators to it.
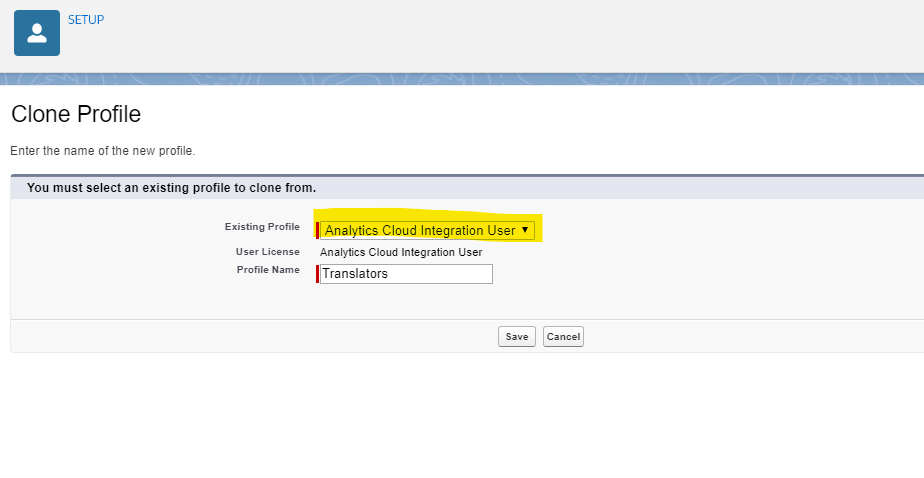
Important Note: you cannot override or change a default profile! Instead, you will clone it and make the necessary changes and save it as a custom profile.
Here are the steps.
Under Users, click Profiles. Click Standard User:
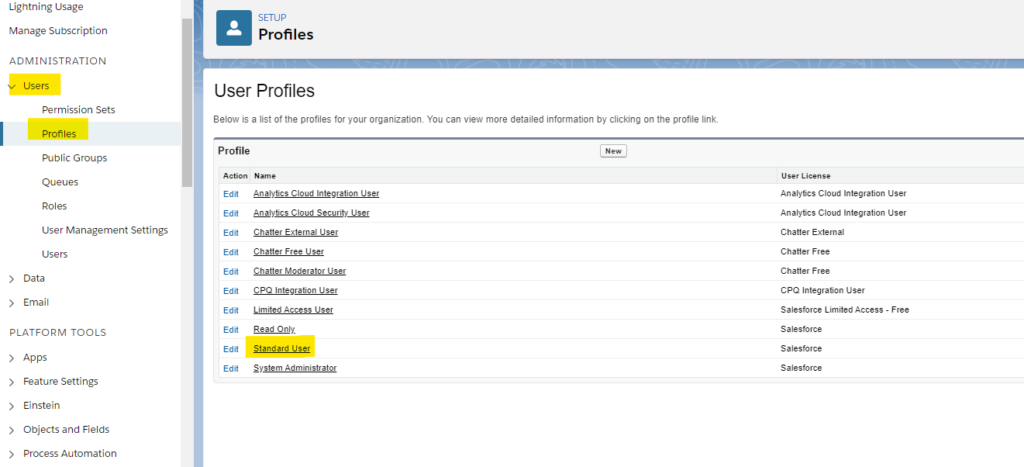
Then from the top click Clone
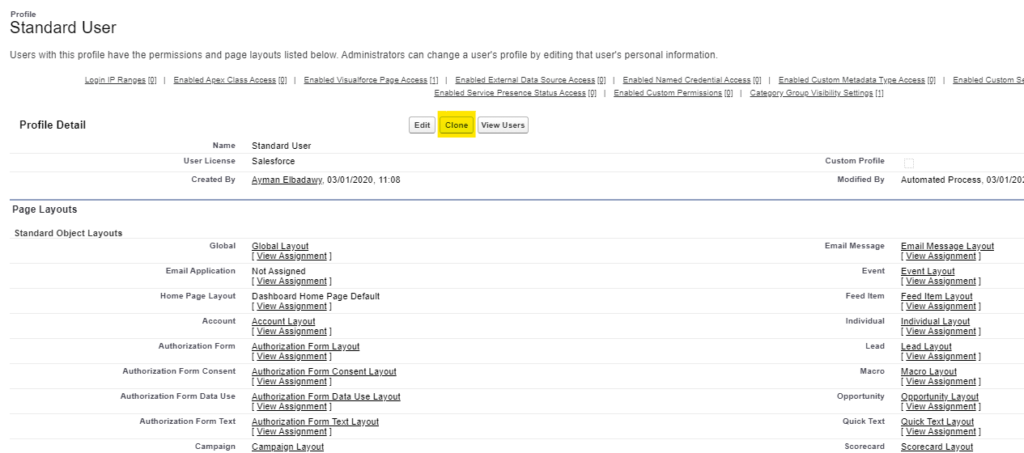
Then, from the Clone Profile screen, select the profile you will inherit from, give a name to your new one, and click Save.
The new custom profile will be opened in read-only mode. Click Edit to customize it.
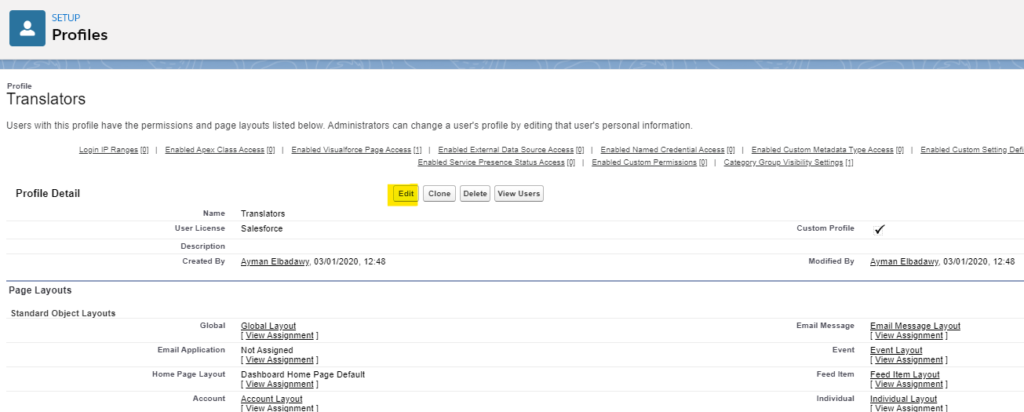
Now, besides adjusting all the necessary settings and permissions, scroll down and make sure to check Manage Translation then save it.
Now, you need to assign users to this profile. Let’s say currently you don’t have any users or translators and you need to add new ones. At the top of the new profile click View Users
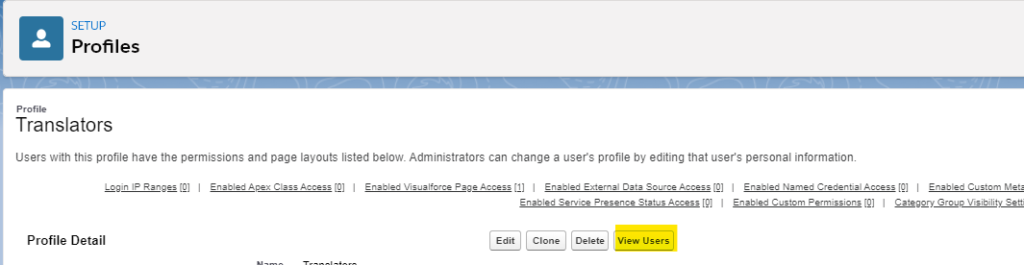
Click New User

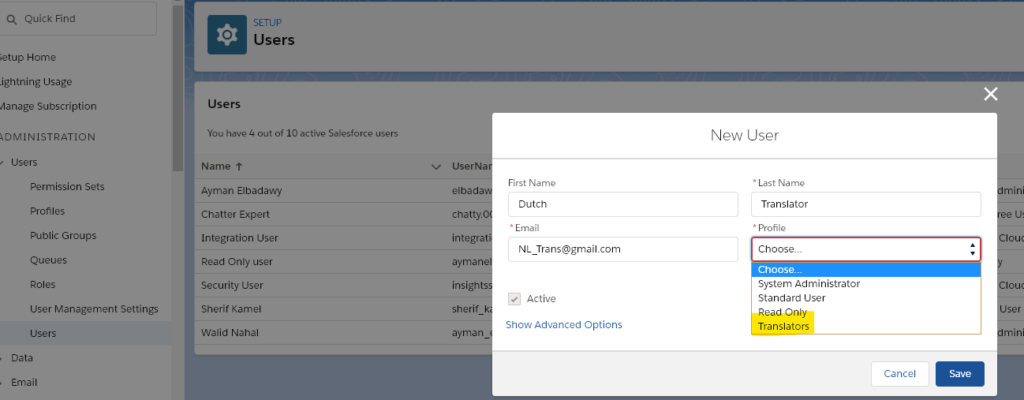
Insert first and last names, email, and assign the new profile to your translator user account and activate it.
Important Note: Advanced Options is very useful!
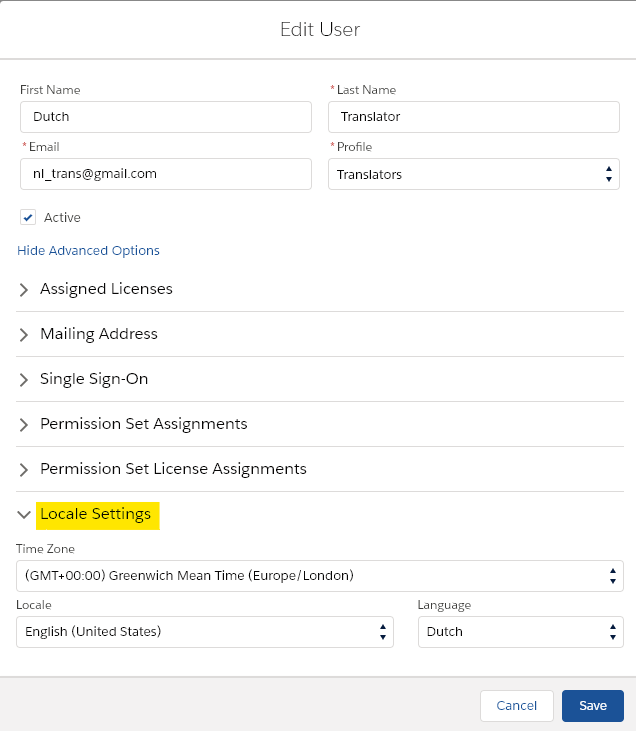
The advanced options allow you to insert more details about your translator to improve managing your localization team and translation projects. As in the above screen, you can set up the translator time zone, locale, and language.
Finally, your Salesforce organization is ready for localization. The next article will be about how to use Salesforce Localization Workbench to export and import translations.
Feel free to leave a comment or to Contact Me for an open discussion.